
CB Basic Backend Tutorials
Welcome to our basic tutorials on how to use the open source ChainBuilder software. ChainBuilder is an easy to use integration platform designed to provide users with the ability to collaboratively link data, analytics, and visualizations to generate dashboard based decision making tools that can deliver content directly to decision makers.
To read more about ChainBuilder, click here.
To use ChainBuilder, first follow the Download instructions here, then follow the tutorials below:
First Steps |
Editor |
Projects |
Dashboards |
Modules |
Admin |
First Steps
- Register for a login username and password at: Download
- Login at: https://dev.chain-builder.net/
- Navigate to the Project "ChainBuilder" at https://dev.chain-builder.net/chainbuilder/chainbuilder
- Follow the Install instructions listed on the ChainBuilder project page
- Login at: https://192.168.56.103/chainbuilder (The IP address only works if install instructions are followed exactly and the VirtualMachine is used. Otherwise, users should refer to their chosen domains.)
- For additional questions, please visit our "Contact” page
Editor
the visual representation of the CB backend, how widgets connect to each other to each other to create the final workflow
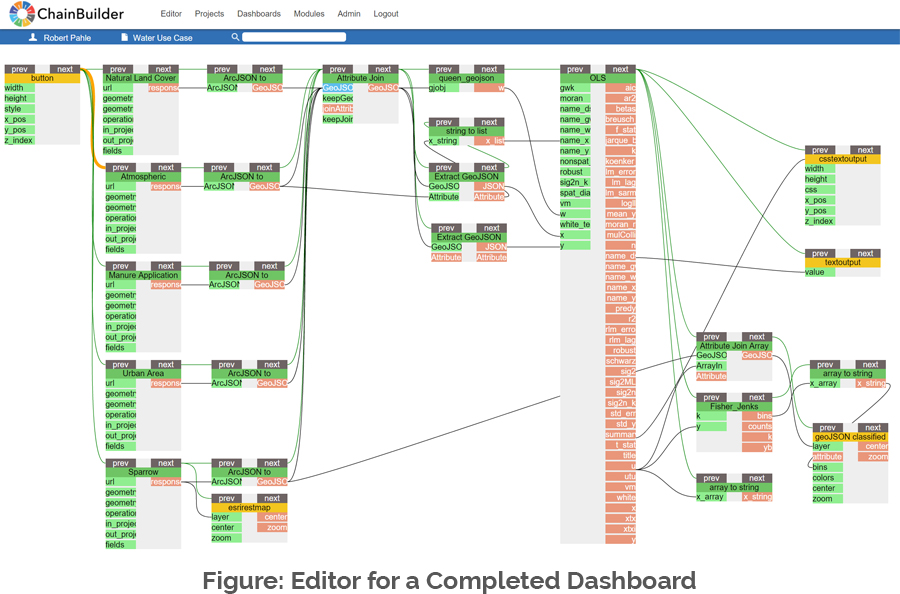
Editor Components:
- Widget: generates front-end facing results on the dashboard, such as a button or chart
- Processing Module: generates back-end facing results in the workflow, such as a data type loader
- Green Lines: the connection between operator modules creating the workflow
- Black Lines: the connection between data and its corresponding output module
Steps for Use:
- Use the search bar find Widgets and Processing Modules, then drag and drop them into the Editor. At a minimum, you will require a: Input Widget, Processing Module, and Output Widget.
- Connect the selected Input Widget to the selected Processing Module and the Processing Module to the selected Output Widget, See the example to the below:
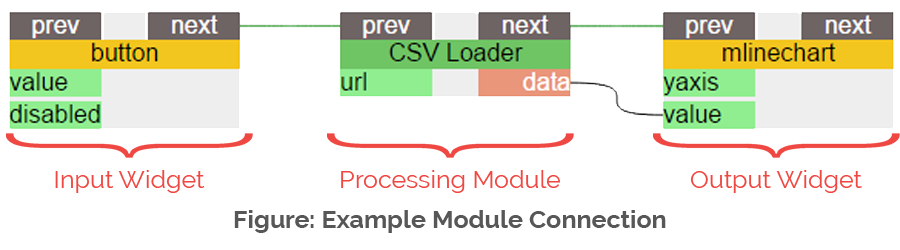
- Connect Data handle to Value handle
- Right-click and enter data URL into URL handle of Processing Module
- Right-click and add Widgets to specific Dashboard(s) (Access Dashboards through the main navigation bar)
- View your results in the selected Dashboard
Projects
manages projects. The CB platform can be used to host multiple projects that can be edited separately
Project Tab:
Hover over the Project tab for the option to create, open, import, and export projects. You can also assign groups to work on specific projects and edit project information.
- New Project: create a project by designating a name and description. these can be edited later
- Open Project: navigate between projects
- Import Project: .cb files can be imported into any CB system
- Export Project: all projects can be exported as a .cb file
- Assign Groups: assign groups to a specific project. Groups must first be defined in the Admin tab
- Manage Projects: edit project names and descriptions, or delete projects
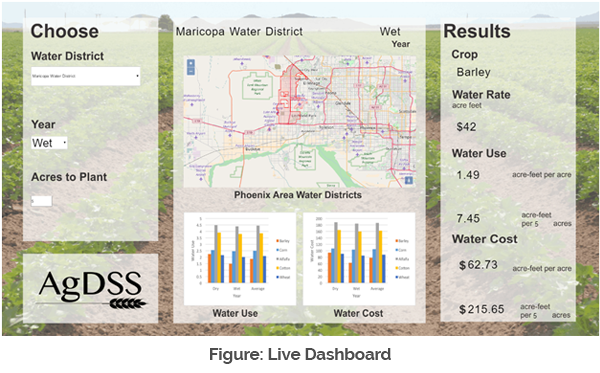
Dashboards
the end-user experience, including graphics, buttons, and charts. The dashboard can be used to edit the setup of the user-facing program.
Dasboards Tab:
Hover over the Dashboards tab for the option to create, open, and manage dashboards. You can also assign groups to work on specific dashboards and edit dashboard information.
- New Dashboard:create a dashboard by designating a name and description. This is where you will determine the height and width of the dashboard. The standard for a full screen dashboard on an HDTV is 1920x1080 pixels.This can be edited later. You can also set a permanent ID, which is a precise URL to a specific dashboard.
- Open Dashboard: navigate between dashboards
- Assign Groups: assign groups to a specific dashboard. Groups must first be defined in the Admin tab
- Manage Dashboards: edit dashboard names and descriptions, or delete dashboards
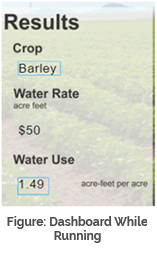
Live Dashboard:
In this screen, analysts can manipulate inputs. The workflow will run automatically when inputs are changed and update the dashboard. While the workflow is running, affected components will be highlighted with a blue colored box. Errors will be highlighted in red.
Setup:
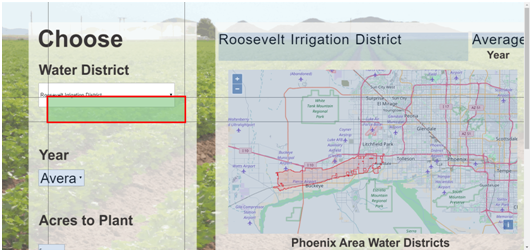
Components to the dashboard can be moved around through the Setup feature. Simply right click on the dashboard, and select Setup.
Within the Setup Mode you can:
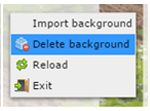
- Edit the Background with a right click and “Import background” or “Delete background.” Backgrounds should be the precise size of the target system. For instance if one would like to show a full screen dashboard on an HDTV the size of the background should not be larger than 1920x1080 pixels.
- Drag-and-Drop widgets to different places. Elements will automatically snap to other elements to ease the alignment. If pixel precise alignment is required the x, y, width, and height values can be set in the editor.
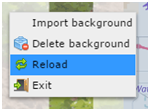
- View Changes with a right click and “Reload.”
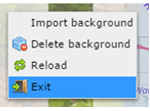
- Exit Setup Mode with a right click and “Exit.”
Modules
the buttons, data type loaders, and widgets that can be added to a project
Modules Tab:
Hover over the Modules tab for the option to add a service root, harvest modules, assign groups, manage service roots, and list all modules.
- Add Service Root: a URL to collection of services that are organized in a machine traversable tree. Input service roots to be added to your list.
- Harvest Modules: traverse newly added service roots in order to add services to the editor for your specific project. Every service has a specific key which uniquely identifies it. If a service root changes or if a user puts in a new service root the harvest mechanism tries to match the services via the key used in the project to the services available during the harvesting process and points the workflow manager to the new services. This allows users to move projects from one server to another and to replace services seamlessly.
It is recommended to use the Harvest Modules tool in order to pull service root changes from time to time. Currently, ChainBuilder is unable to notify users about service root changes. - Assign Groups: assign groups to a specific module. Groups must first be defined in the Admin tab
- Manage Service Roots: edit module hrefs, usernames, passwords, tokens, and public status
- href: URL to the service root (this must be set)
- Token/Username/Password: can be set to protect the service root
- Public Status: if enabled, the service root is public and its services can be used by other users of this ChainBuilder installation
- List All Modules: view the name, description, inputs, and outputs for all possible buttons, data type loaders, and widgets
Admin
the administrative pieces to CB, such as group, user, and database controls
Admin Tab:
Hover over the Admin tab to manage groups, users, and databases.
- Groups: create new groups and assign appropriate users and projects
- Users: create new users and assign groups. Manage user usernames, emails, names, colors (appears when you hover over a module in the editor or dashboard, setup mode only), administrative rights, creation rights (needed for all dashboards, service roots, and modules), and service root rights (needed to add and change service roots).
- Database: only appears for administrators who can view and modify the ChainBuilder database
- Restart: restarts the sync service, used if dashboards or the editor do not update properly